(경어체를 쓰려고합니다. 읽으시는 분들을 위하는 마음이 아주 솟구치고 있는 순간이라서요!)
✨ 간단 근황
8월 말에 접어든 지금 저는 팀으로 참여하는 스터디/활동 만 3개가 될 상황에 놓여 있습니다.
물론 직장이 없기 때문에 가능한 일이긴 하지만, 현재 컨트리뷰션 활동을 하고있음에 더해 컨트리뷰션 활동 내 사이드 프로젝트를 시작했는데요. 이제 9월에는 (참여하기로 이미 6월에 예정되었던) Kaggle 스터디를 시작할 예정이에요.
그래서 Notion 페이지를 하나 더 만들어 관리를 하기로 했습니다. 무슨 바람이 들었는지 새로운 페이지를 쓰고 싶었어요. 쓸만한 템플릿을 찾던 중, 대학생을 위한 템플릿 같은 것을 보게 되었습니다. 개인적으로는 조잡한 것 없이 필요한 내용만, 한 페이지에는 한 데이터베이스만 노출되는 것이 최고라고 생각했었는데, 위젯을 한 두가지 쓰는 것도 도움이 되겠다는 생각이 들었습니다.
아래는 제가 감명받은(?) 해당 템플릿 구성입니다.
indify.co 회원가입
먼저 indify에 가시면 로그인을 하라고 할 겁니다. 저는 Google 계정으로 회원가입-로그인을 했습니다.
그렇게 가입(로그인)을 하고 나면 축하 이벤트 메시지가 뜹니다.
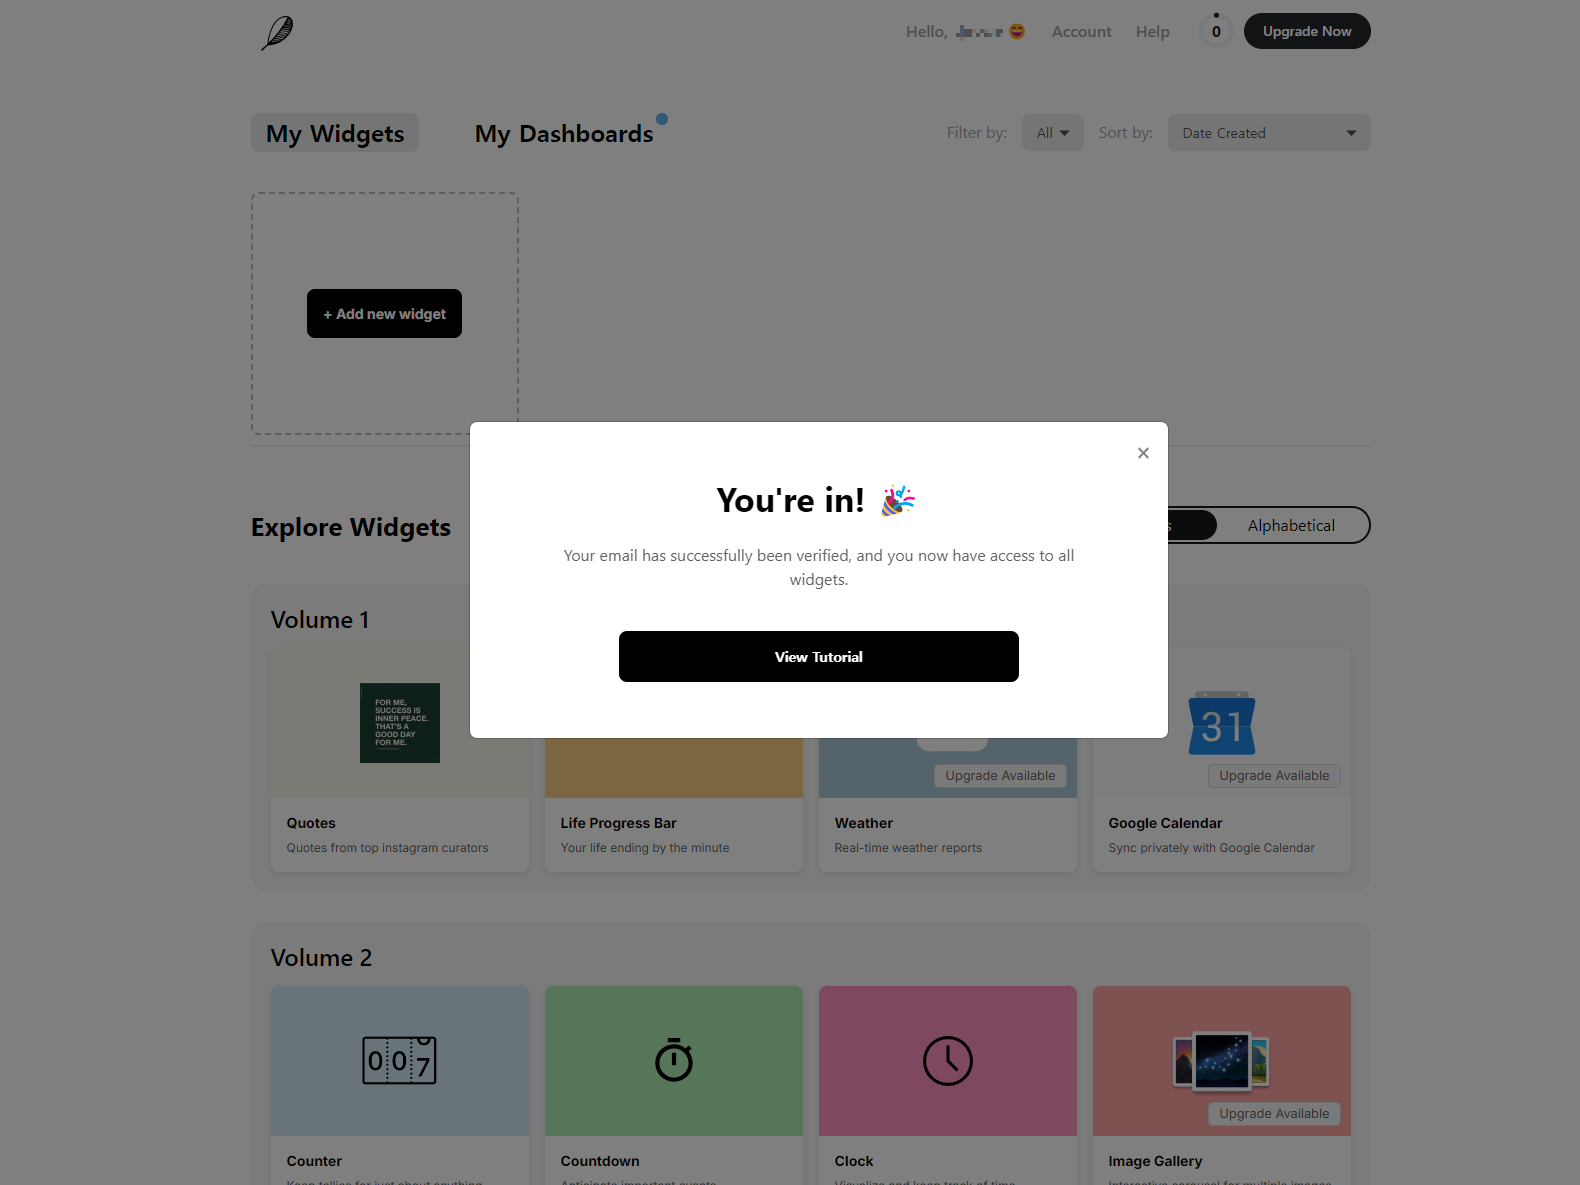
튜토리얼을 보겠냐고 하는군요. 잠시 빌려와볼까요?
✨ How to create/embed widgets ✨
어떻게 만드는지 튜토리얼(바로가기)을 빌려왔습니다.
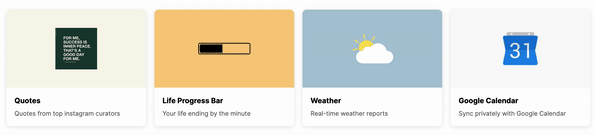
Create a widget : 위젯을 만듭니다. 원하는 위젯을 선택하는데 명언이나, 날짜 진행정도 박스, 날씨, 캘린더 등이 있습니다.
Setup & copy the URL at bottom left corner : 해당 위젯을 원하는 대로 설정한 뒤, 왼쪽 하단에서 링크를 copy해줍니다.
Paste the URL into Notion and choose "create embed" : 해당 링크를 노션에 붙여넣기한 뒤, embed로 생성해줍니다.
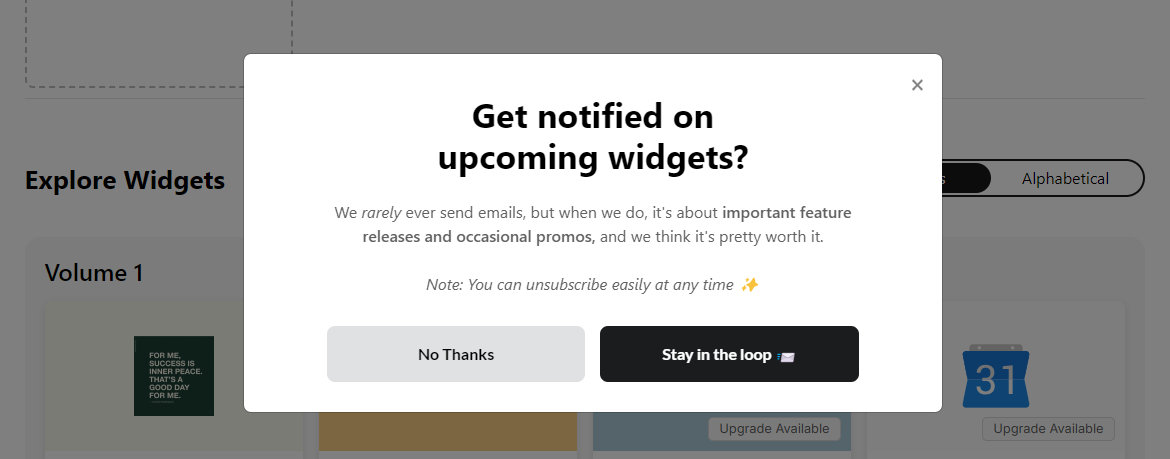
그리고 email을 받아보겠냐는 메시지는 편하게 No Thanks 거절(!) 하셔도됩니다.
✨생성해보기
그럼 직접 만들어볼까요?
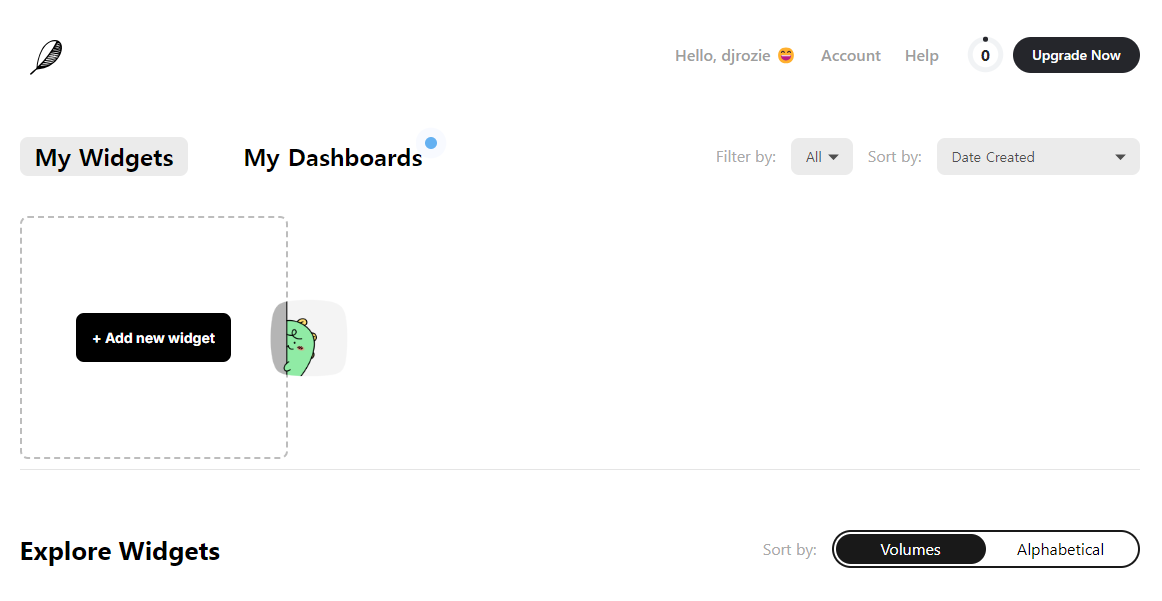
▢ Add new widget
새 위젯 만들기를 눌러줍니다. 그럼 바로 아래에 있는 여러 Widgets로 이동합니다. 날씨 위젯을 만들어보도록 할게요.
그러면 위젯의 제목을 정하라는 메시지 박스가 뜨는데, 추후 수정이 가능하니 마음대로 정하시면 됩니다.
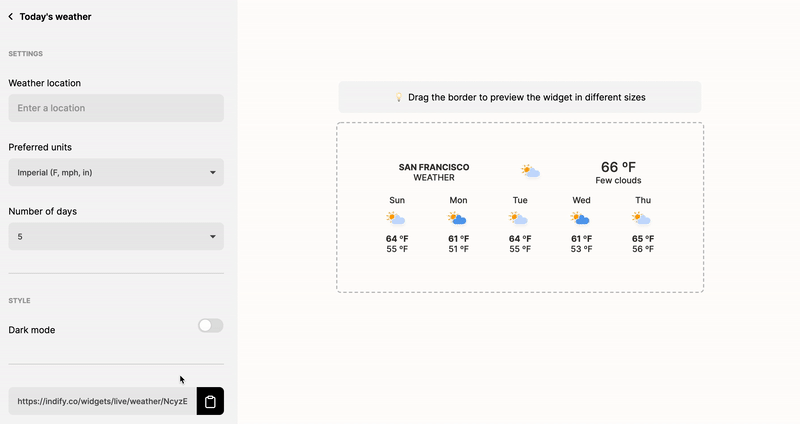
▢ widget setup - 옵션 설정
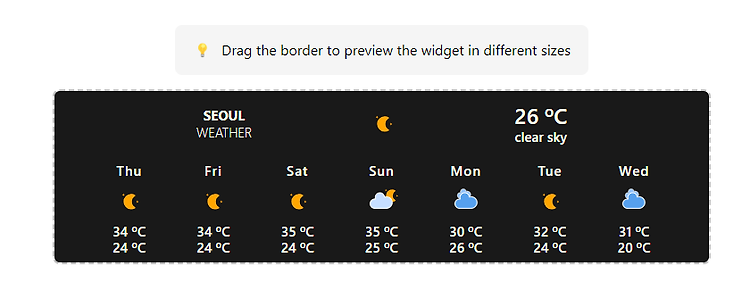
다행히 서울 날씨가 있네요! 화씨로 표기되어있으니 셀시우스로 바꾸어줍니다.
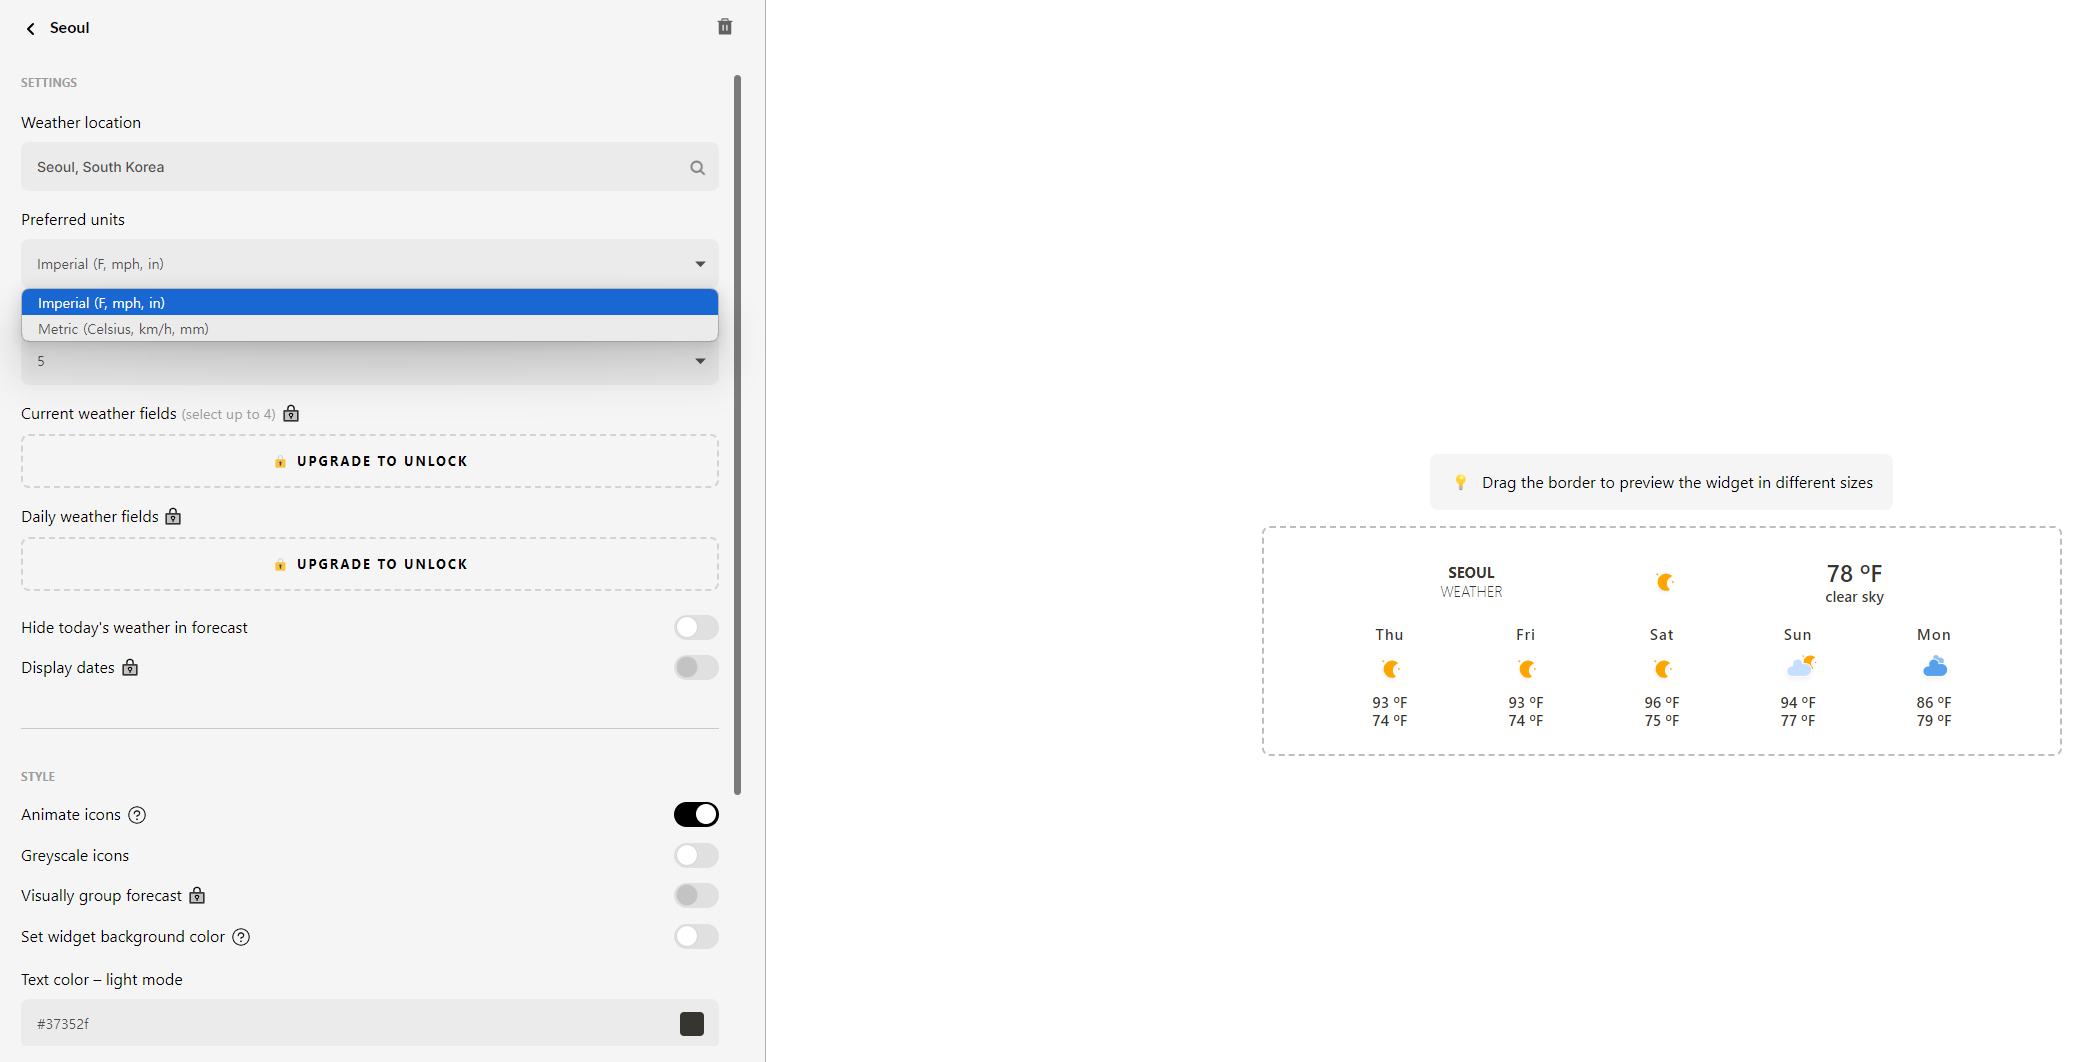
- 저는 일주일 날씨를 한 눈에 보고 싶어서 Number of days를 7로 바꾸어줬습니다.
- Hide today's weather in forecast 의 경우 오늘 날씨를 제외할 것인지에 대한 여부입니다. 제외하고 싶으시다면 버튼을 활성화 해주세요.
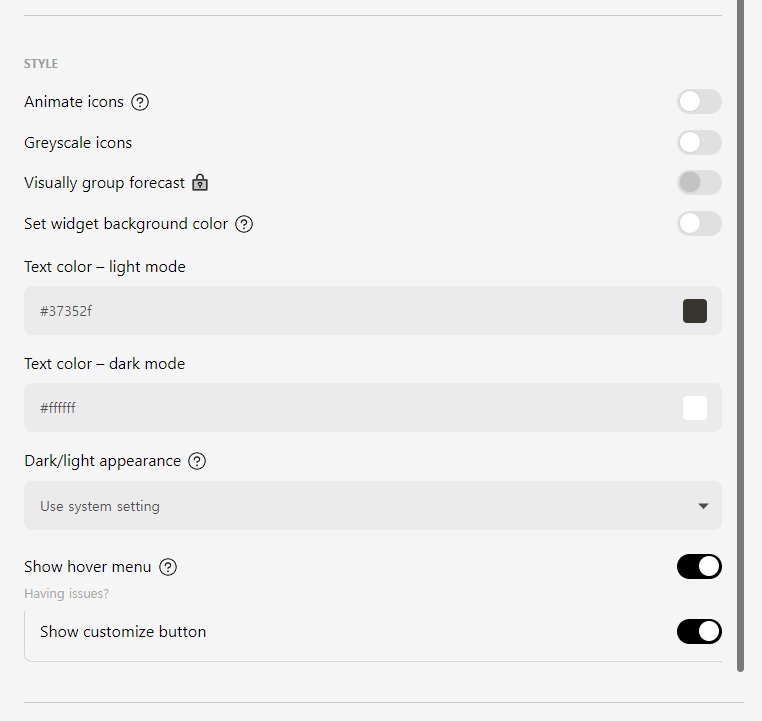
하단 style을 가시면 여러가지 옵션들이 있습니다.
- Animate icons : 날씨 모양이 움직이게 할 것인지 입니다.
- Greyscale icons : 날씨 모양을 흑백으로 할 것인지 입니다.
- Visually group forecast : 그룹화된 예보를 시각화한다는데 저는 paid 유저가 아니어서 모르겠습니다 :<
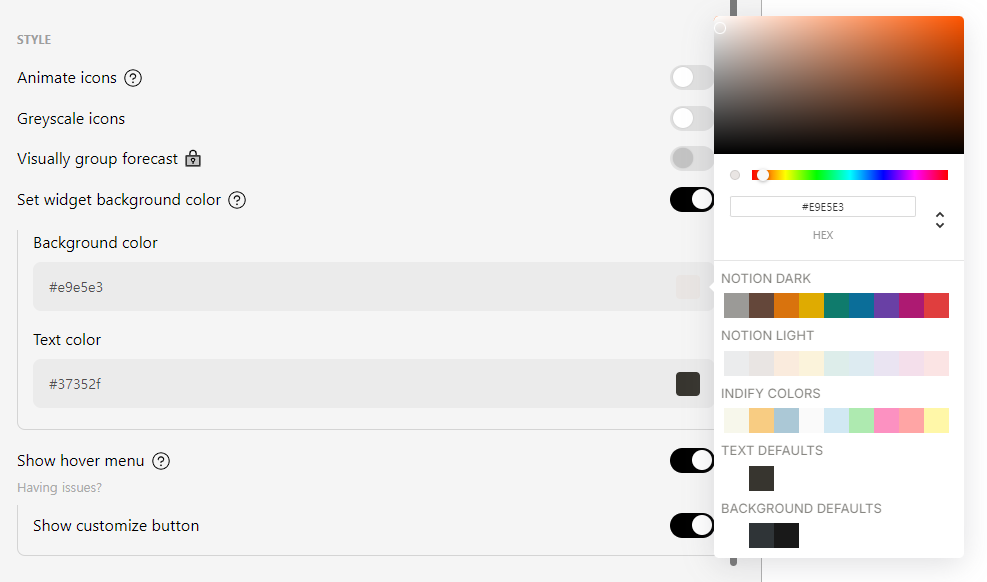
- Set widget background color : 위젯의 배경 컬러를 지정합니다. 색상코드를 직접 입력해도 되고, 컬러 팔레트에서 선택하셔도 됩니다.
- Text color – light mode : 라이트 모드(대개 기본 모드)일 때의 텍스트 컬러입니다.
- Text color – dark mode : 다크 모드(브라우저나 윈도우에서 설정한 모드에 따릅니다)일 때의 텍스트 컬러입니다.
- Dark/light appearance : 라이트 모드나 다크모드 설정에 대한 설정입니다. 선택 토글을 누르시면 다음과 같은 옵션이 뜰 텐데요.
Do nothing / Use system setting / Light / Dark : 설정 안함 / 시스템 설정(보는 사람에 따라) / 라이트 / 다크 - Show hover menu : 위젯에 설정 menu를 띄울것인지에 대한 질문입니다. 위젯을 보는 사람이 직접 라이트/다크 모드를 설정해서 볼 수 있죠.

저는 이렇게 만들어졌습니다. 우선 메모리를 아끼기 위해 Animation 기능을 껐고, 시스템 설정에 따라 라이트/다크가 바뀌도록 해두었습니다. 지금은 제가 다크모드를 사용 중이기 때문에 어두운 배경이 되었어요. 다크 모드 텍스트 컬러는 흰색에서 옅은 베이지 색으로 바꾸었습니다.
▢ Copy Link and Embed it
왼쪽 하단에 COPY LINK 에 있는 링크를 복사해줍니다. 주소 뒤에 서류 모양을 누르면 바로 클립보드에 복사가 되기 때문에 바로 ctrl+v 하시면 됩니다. 물론 제 것을 사용하셔도 무관합니다. (하단에 주소 공유)

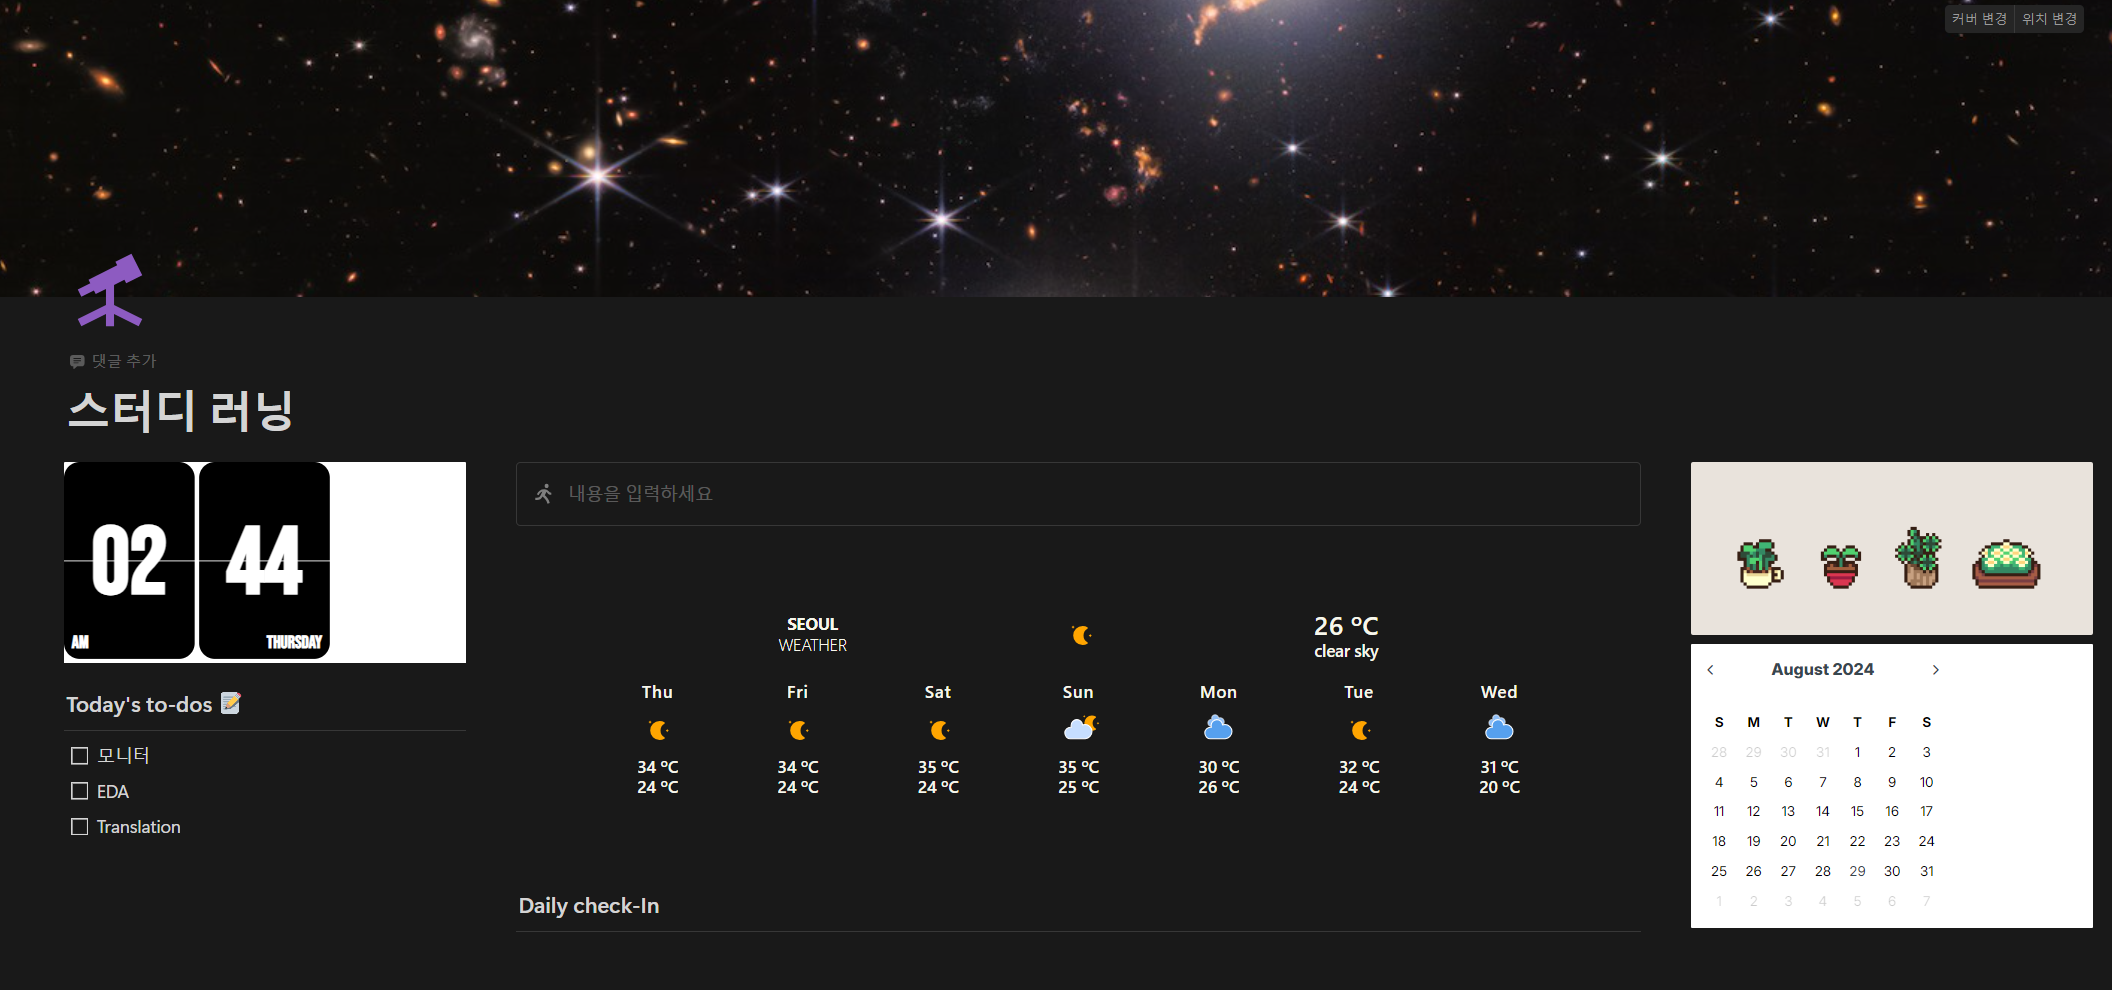
예쁘게 들어간 것을 볼 수 있습니다. 시계와 캘린더도 수정해야겠군요.
캘린더 생성 시 주의사항
참고로 캘린더는 구글 계정을 연동해서 구글 캘린더를 사용합니다. 따라서 캘린더를 사용하시고 싶다면 (1) 구글 계정을 이용하시거나, (2) 템플릿에서 제공하는 기본 캘린더를 그대로 쓰셔도 될 것 같습니다. (상단에서 이미지 캡션에) 공유드린 템플릿 페이지 링크를 타고 들어가서 템플릿으로 페이지를 생성하시면 캘린더가 있으니 그 캘린더를 데리고 쓰시면 됩니다.
또한 이벤트 날짜의 컬러를 바꾸는 것은 요금을 내고 사용하는 유저만 가능합니다.
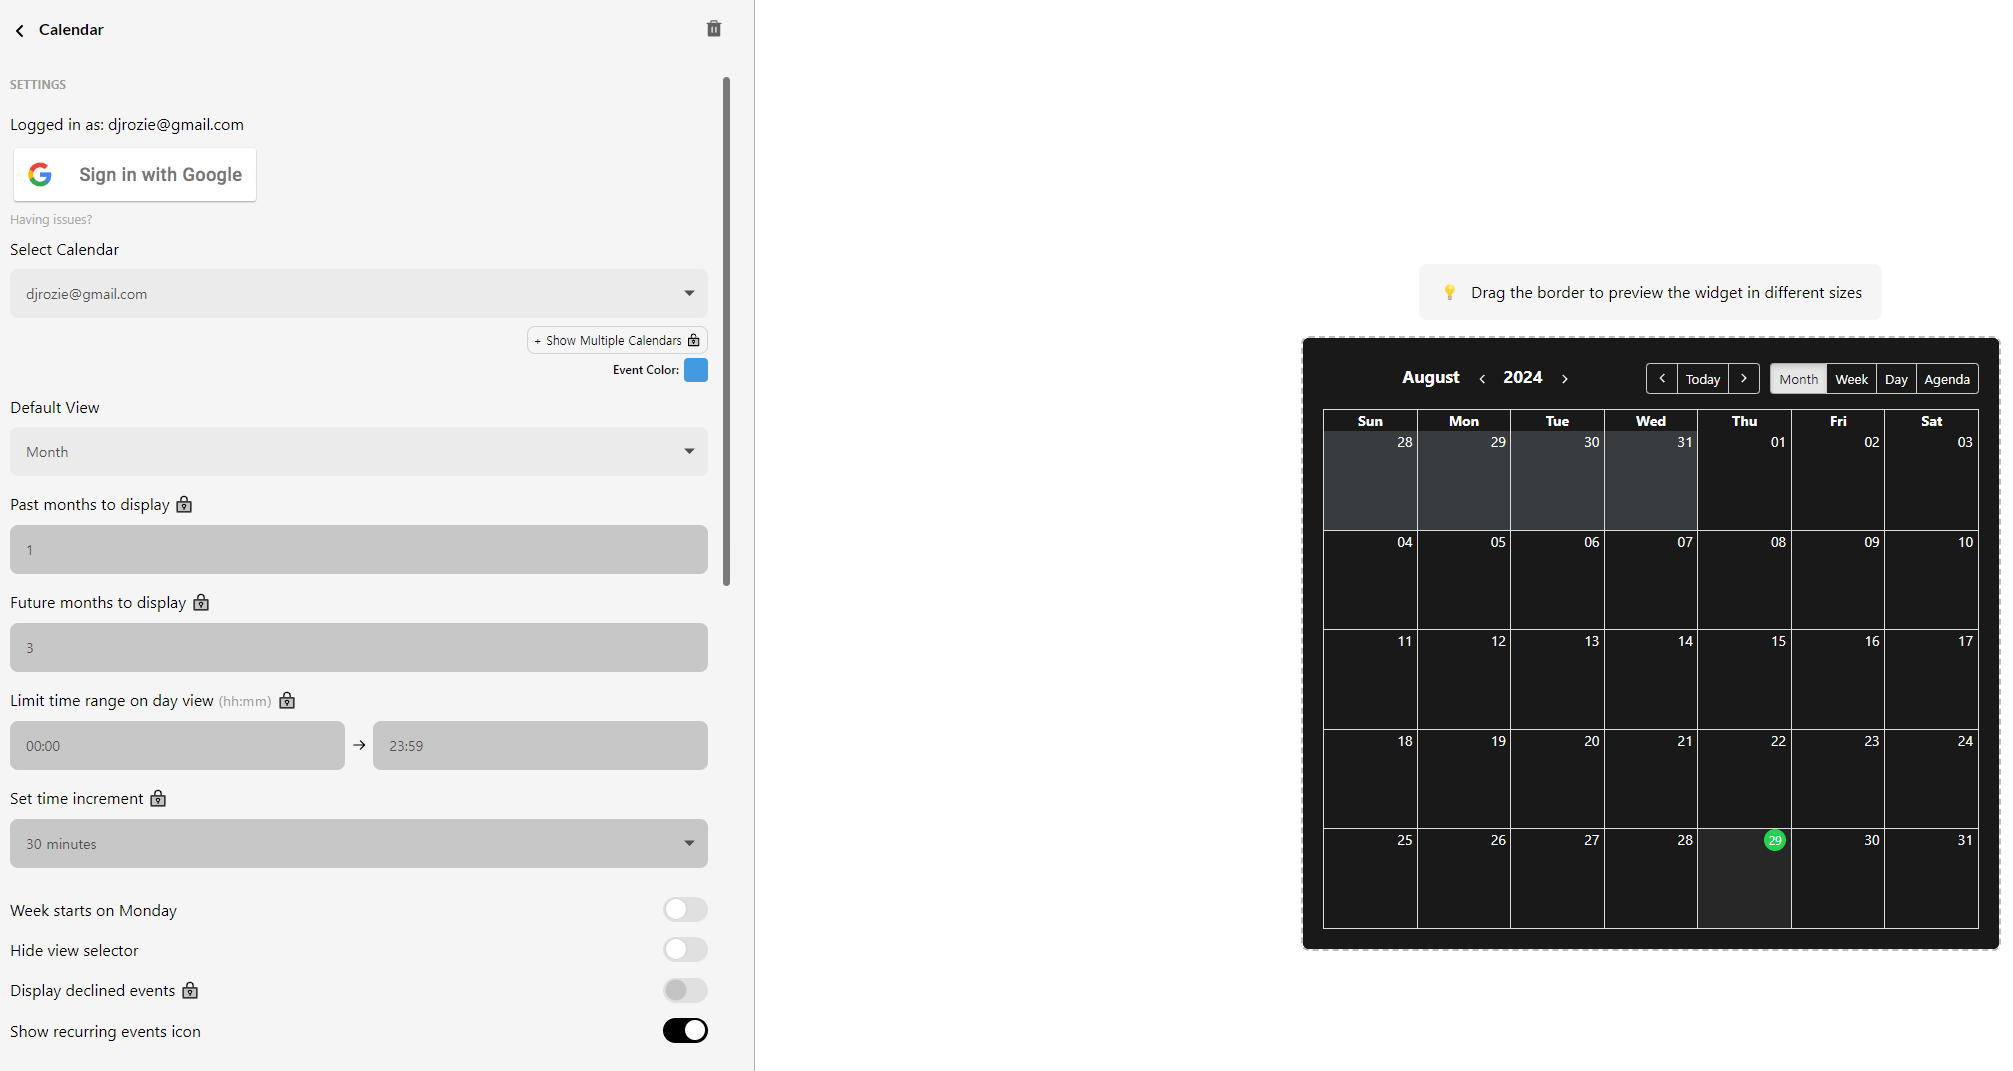
저는 이번에도 색상을 시스템에 따라 되도록 설정하였기 때문에 어둡게 나오고 있습니다.
그리고 저는 24시간 표기가 편해서 24시간으로 바꾸어 두었습니다. 하루의 기준이 되는 시간 설정(예: 하루 시작을 00:00AM이 아 04:00AM로 설정)은 요금제를 가입해야 합니다.
- Week starts on Monday : 주 시작 요일을 월요일부터로 바꾸려면 켭니다.
- Hide view selector : 월, 주 등의 기준으로 볼 선택 메뉴를 숨길지 선택합니다.
- Display declined events : 거절된 이벤트를 표기할 것인지 선택인데 잘모르겠네요.
- Show recurring events icon : 현재 진행중인 이벤트에 icon을 사용할지 여부입니다.
- Use 24h time format : 24시간을 사용하려면 켭니다.
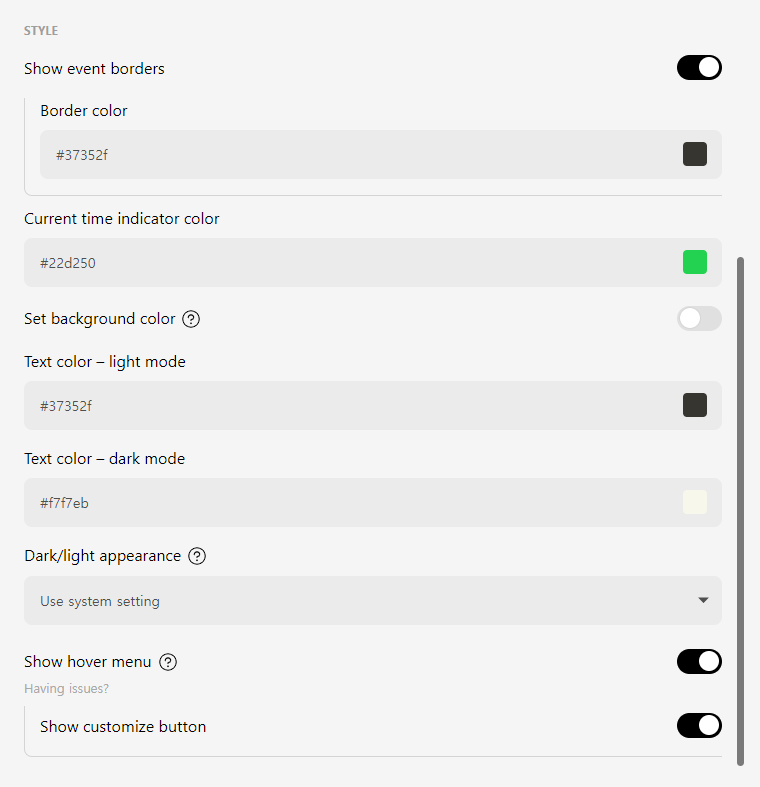
Current time indicator color 메뉴 정도만 설정하였습니다. 본의아니게 네이버 그린(?)을 골랐네요.
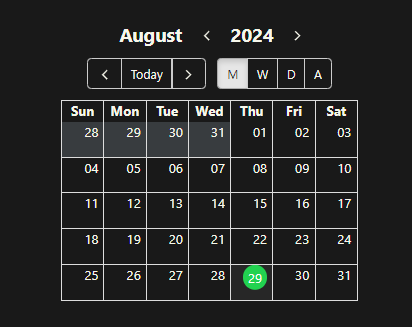
완성 모습입니다. 괜찮은 것 같아요.
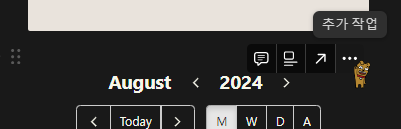
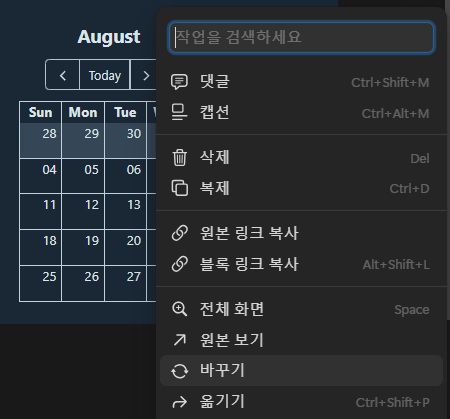
임베딩 팁
같은 위치에 이전것을 대체하여 임베딩하고 싶다면 이미 임베딩되어있는 개체에 마우스를 대고 추가작업을 누른뒤 바꾸기를 누릅니다. 그러면 링크를 새로 붙여넣도록 주소 칸이 나옵니다. 거기에 새 주소를 넣어주시면 됩니다.
노션 꾸미기 사용에 많이 게을러진 요즘인데, 다시 이것저것 넣으면서 사용을 잘 해야겠습니다.
크게 복잡한 기능은 없으나 어딘가 어려우시다면 언제든 댓글로 질문주세요.
참고해주셔서 감사합니다.